Found a website on the construction and workings of a DC motor. What helped me understand it a little more was how a DC motor is physically constructed with the theory involved as well. I know now that the stator magnets, which use N and S poles, are actually what keep the shaft rotating when current is applied through the coils. The coils, with current applied, create an electromagnetic field that reacts with the magnetic field of the stator magnets. What can sidetrack me is the fact that the polarity of the coil magnets change from N to S and back again as they rotate inside the stator magnets, but also seems to be the basic operation of a DC motor.
http://pcbheaven.com/wikipages/How_DC_Motors_Work/
Monday, September 24, 2012

Sunday, September 23, 2012
These boards are light...
After going through last year's spring quarter blogs during the electrical portion, I found something that reminded me that when I can't figure something out to slow down and let the problem air. If I try and focus on the problem and not what my solution 'could' be, I seem to mentally block myself from any more figuring.
Here we have a light board that comes bare with wires to wire it all up. Includes the entire lighting circuit for a Kenworth, judging by how the schematics are drawn up. We had some trouble with getting the brake lights, stop lights, and turn signals to work properly. After giving it a day to think about, we came back in the morning and studied the schematic and diagrams provided in the teaching manual. We figured out that the blinkers and the brake lights both are wired in series with the blinker lever. Once we found that out, the rest of it was in the bag.

Here's a circuit we wired up with: a 9v battery, relay, wires, and a light bulb. Crimped the wires for the relay ourselves, and can now be used as a tester relay. Very handy.
After going through last year's spring quarter blogs during the electrical portion, I found something that reminded me that when I can't figure something out to slow down and let the problem air. If I try and focus on the problem and not what my solution 'could' be, I seem to mentally block myself from any more figuring.
K.I.S.S. Keep It Simple Stupid
WEEK 1 HRS: 24
Tuesday, September 18, 2012
Ketchup
When we got together at the start of class and shared some really interesting stories about some of the experiences we had during our internships and jobs this past summer. Some of the best knowledge I heard came from Raul and Ian, when they talked about their international experience in Denmark. The whole concept of the fact that our profession is much more than just local, but global. It is starting to make me look outside of whatcom county or fishing in Alaska for work.
Here's a pic of us having a correct circuit board set up. Load, control, and fuse are all necessary parts of a working circuit


Friday, June 1, 2012
Adventure Tyler


 I really enjoyed helping take apart the steering gear box to fully understand how 'stuff' works. When I was watching the videos on Sheppard, there seemed to be SO much to remember that I kind of got lost in all the tests and things. As we took the gearbox apart I was able to see how the input shaft would actuate inside the piston. We went so far as to take all the ball bearings out.
 The only way that we could figure out how to get them back in was take some round stock and make some longer all threads out of them. We then inserted them through the plate that the input shaft goes through and threaded them into the piston housing. What this accomplished is keep the actuating shaft straight inside the cylinder to allow the bearings to go all the way around. There were 31, so we needed room.
I never got to do a pressure or flow test on a steering system, but I look forward to finding time next week to doing some of the things over again that we've learned this quarter.
(I hear this guys lookin' for an intern)
Ruts are for driving straight
This past week or so we did a bunch of stuff on alignment. Because of my past in residential framing, finding plumb and square in objects that aren't is fairly easy for me. We used both string lines along with measuring tapes as well as lasers that told you what the toe, camber, and thrust is. Using the string and tape seemed very archaic, so obviously the lasers were easiest to use and required little to no thought in getting very accurate measurements. The hardest part when using the strings was measuring the thrust with the string line on a longer rig and not being able to see when the string was touching the front of the rear or intermediate tire. I'm not sure how to get around that. I was trying to wiggle the string a bit before bringing it close to the tire, then when it stopped I figured I was 'close'. The measurements I got when I used both methods varied a lot more than I would be comfortable at.
You had me at diesel
Aside from some crazy real life stuff these past two weeks have been very interesting at school. I'm finding that I am not that mechanically inclined as I had hoped. Some of the basic concepts in the transmissions and torque converters seem to confuse the heck at me as I just sit at a moving diagram of how stuff works, not understanding how stuff works. It is making school extremely challenging for me. I love it.


Here I helped some of the guys take apart an axle from a 744 John Deere Loader. Pretty interesting stuff here. Turns out it 2950 lbs can really ding a concrete floor. What I learned these past couple of weeks that I consider to be the most valuable is this: if working on something heavy, have it as close to the ground as possible.
Thursday, May 10, 2012


 Steering axle/foundation brake inspection


 Drive axle/foundation brake inspection
Removed the drive axle, foundation brakes, and adjuster arm for inspection. If I could have, I would have made sure the circuit had 90 psi in the system before checking adjustment with the parking brakes released. I would then use a brake tool to pry the pushrod making sure that it is within 3/4 to 1 1/2" of my 2 1/2" spec for type-30 can. After installing the S-cams I checked vertical play and end-play to verify that the bushings were not worn or I didn't need spacers on the s-cam itself. Both were at ~.03" of play.
I then replaced the wheel seal and after washing both bearings in the parts washer I inspected them under a light for cracks/breaks, nicks in the rollers, etc. I tightened the inner nut to 200 ft/lbs --> backed off 1 full turn --> torqued to 50 ft/lbs --> backed off 1/4 turn. From there installed the lock washers and guide, then torqued the outer nut to around 475 ft/lbs. All the while rotating the wheel as I torqued them down. After failing a couple times, I ended up having my wheel end adjustment as close to .001" as I could.
From there it was a fairly simple task of cleaning the spider assy, as well as the drum itself. Putting it all back together went smoothly. For these particular brakes it was easier to put the rollers in the shoes before putting then on the spider. From the pics I've posted, I kept all my parts and tools in a clean and organized manner so as not to get more confused than normal.
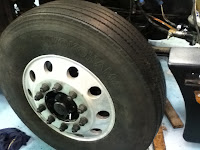
Put the tires back on with little to no effort using a tire bar and torqued them down to spec (I believe they were called out at 450-500 ft/lbs).
This is a video of the planetary gear set in the ZF Loader and Gary, Jeremy, and I tore apart and put back together.
Subscribe to:
Posts (Atom)