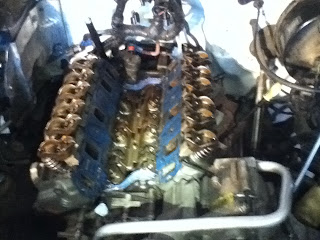
Monday, May 6, 2013

SPQ13 Tracy

This past Thursday we went down to B&G Machine in Seattle as a class.  What a sight.  I have never spent time in a shop like that, so it was great to see one that is also an industry leader in what they do.  Out of all the mechanical work they do there, I think that what I took the most out of the tour was B&G's business model.  Johnny talked a lot about making sure that their employees are in line with what they as owners have as goals, both long term and short term.  So much of what he said was plain simple, honest business practices.  Kind of makes me wonder why more shops don't adopt those kinds of philosophies in their business practices.


Johnny showing us how they grind down the cranks

One of the guys showing us a refinishing of a cam

Another guy putting weights on the crank

Cutting the deck.  I think it was only taking off 0.020" at a time 

In the engine shop.  Putting her back together again

In the Dino.  Uses water in a funnel shape, and opens and closes the
funnel to create pressure differential.
Today I attempted to draw out a very simple hydraulic schematic for the new Peterbilt and for a winch/winless that was taken off one of the boats out back.  I feel somewhat comfortable in my skills at reading schematics.  It was a real test in how much I do know as far as hydraulic systems go, but also a real eye opener in how much I don't.  I now know I need to continue focusing on the basics.

Hours
Week: 32
Total: 180


Monday, April 29, 2013

SPQ13 Tracy

     This week has been chock full of crazy little things filling my grey matter.  Finished up electrical week before last with a presentation by the automotive instructor.  He had the Modis hooked up to the solenoid that controls the gas fume (?) cartridge.  I got to see and understand more of what is happening when the spike occurs after the magnetic field collapses.  From there it was a fairly easy correlation to draw as to what needs protecting in the computer modules, and how capacitors are used to capture electrical spikes like this to use somewhere else in a system instead of letting the energy go to waste.
   
     Once finished with electrical I hit hydraulics pretty hard, finishing up my CAT basics, identifying about a third of the fittings, and getting through the walk-around on the simulator.  My previous knowledge in hydraulics was all assumed and hearsay, so it's been really helpful to get the basic explanations out of the way.  The kind of questions I don't think about asking.  Learned how pistons work along with the different styles and the difference between pumps and motors and how to tell simply by looking at them from the outside.  Was cool to finally figure out the axial pumps and see how they are made variable by using a pilot control pump to move the swash plate back and forth.  I now also know that an axial pump is going to be used for higher pressure (>3000psi) even when it is fixed, as compared to a gear pump which will generally be used for lower pressure systems.


This is a gear pump I dis-assembled, made by Commercial Intertech.  After taking it apart, I tried to figure out what the failure was.  Inside the pump, on the walls on the inlet port side, something had caused either (1) cavitation, (2) aeration, (3) metal on metal contact, or possibly contamination.  After watching how cavitation works I figured that the cavitation was going to occur more at the high pressure side.  The fact that the grooves in the walls were constant all the way around ruled out both cavitation and aeration for me.  I learned that if a gear pump is run at too high pressure, the film of oil that separates the gears from the walls will not be there as it has either been pushed through by force alone or the heat has caused the viscosity to drop too low to even create the film... or both.  Also, turns out that the shafts that the idler and drive gears are on can actually flex under that much pressure, which can cause the gears to push out against the walls.


    By feeling the bushings that sit in the pump case in which the gear and idler gears ride in, I found that the were in pretty rough shape.  Also, as can be seen by the picture, there's been some pretty intense friction going on between bushing and shaft.


    A close look at the gear teeth tells it all.


     Identifying hydraulic fittings has been a true test of patience more than anything.  Just when I thought that I had one figured out, the next one would stump me.  I had to do a bunch of research on my own to figure this stuff out, if even a little bit.


    My catch up was measuring fitting itself, which turns out to be kind of a big deal.  Turns out close doesn't cut it when ordering parts, even though it's all Societies of the Nominally Vague.  Basics for me was to know this:

-TAPERED 
NPT/NPTF, BSPT, BSPP (<-- only one that isn't tapered)
-PARALLEL
UN/UNF, METRIC PARALLEL, METRIC TAPERED (<--- only one that isn't parallel, imagine that)

Once that's found out, using the handy dandy chart up there for step 1, I was then able to confidently measure the fittings correctly.  


     We messed around on the hydraulic board a bit late last week and, after struggling for a time, came to a pretty neat discovery regarding unidirectional restrictors and how they work.  We were called in the instructions to set the pressure relief valve from 250psi - 500 psi in 50 psi increments and record the flow rate, time for the rod on one of the cylinder to extend, and time for the rod to retract.  
     Without spewing the data, we saw the extension time and the flow stay the same for every psi change but the retraction times decrease as the psi increased.  We think what was happening was, as the schematic shows, that the check valve was only letting a certain amount of hydraulic fluid through the variable restriction, while during retraction the check valve would unseat, allowing the same amount of fluid through the variable restriction as well as through the check valve.  At least, that's what we think happened.  Have a lot to learn yet on it, but thinking about it all none-the-less.  

Hours
Last 2 Weeks: 68 
Total: 148


Monday, April 15, 2013

SPQ13 TRACY

     Finished up the test light boards involving relays that have either open, VD, or short (ground or power).  A couple of the relays were 'bad', but the book that accompanies the lightboards gives us instructions from 'the boss' to confirm why the relays were bad.


     Discovered this week that the coil will have a specific amount of resistance - really only useful in the real world to confirm a suspicion - and that diodes serve as a current checkvalve.  They only let current flow one way.  This is due to a diode being made up of two different materials - namely the anode and the cathode.  Both materials have a different number of electrons in the outer ring of their atomic structure.  This means that one is more readily accepting of the movement of electrons.  In other words, current flow.

     
     By isolating the diode and testing with my DMM set to the diode test setting, I was able to test the voltage drop between the two.  With the leads hooked up one way the reading read OL, while switching the leads read a specific reading to that diode.  Looks like Jeff had hooked up a OΩ resistor to the back that simulated a short to ground on one of the boards.  This blew the fuse on the control side of the circuit.


     Here is a snapshot of one of the teeth on Alex's Cam Position Sensor.  The vertical lines of the pulse width should be vertical.  Caused the computer to not be sure when timing was exactly, which caused a misfire and a code.


Hours:
Week: 40
Total: 80


Monday, April 8, 2013

SPQ13 Tracy

Another quarter starting with electrical troubleshooting.  Most of what we've been covering in class has been a review, but has been helpful in many ways.
Things that I will take from this week about electrical troubleshooting:

  • Circuits are circular - Any circuit in a truck must have a voltage source, circuit protection, a switch, and a load.  Any break in the circle creates an open circuit.
  • Current is the same throughout the system - In a series circuit, the voltage is distributed between loads.  This is very helpful to remember while finding short.
  • Troubleshooting starts at the load - Black lead goes to most ground point - battery.  Red lead starts at the load and moves from there.  
    • 12V before and after load - open ground side
    • 0V at load - open hot side
    • <12V before load and 0V ground side of load - voltage drop hot side
    • <12V before load and anything other than 0V ground side of load - Voltage drop ground side of 
When I was working on the relay boards today I was noticing a few tricky ones.  The relay operated fine (hear/touch) and the load read 12v before and 0v after.  Tested the voltage drop on both sides of the relay out of curiosity and found that there was less than 12v before the relay and 0v after.  Chased them down to find voltage drop on the hot side.  I am pretty sure I didn't catch this the last time I did the boards.  

Found that the driver headlight was out while the passenger light was still on.  Hooked my black lead to negative battery and probed at the light with red lead.  Read 12.4 (ish) until I tested the ground side.  Took the terminal going to the head light apart and found this.  Obvious open ground side of circuit.

Hours:

Week: 40
Total:40


Tuesday, April 2, 2013

SPQ13 Tracy

Learned some more great things about why Jeff is having us use the blogs.  I've always viewed them as a source of information to come back to when I needed it later in life.  Come to find out they are used primarily as a means of cementing what we are learning in class.  I now view my blog as a more immediate benefit and can see myself using it much more often.

Monday, January 14, 2013

Winter Qtr starts again

Not a lot of hours in the shop so far, and wont be for the rest of this quarter due to extra general ed classes I'll be taking, but I do have a little bit that I've picked up so far.  BTC's Yale forklift was burning coolant and poofing out loads of smoke, so I finally got the head off today.  I want to do some more research in regards to what kind of unique wear that propane has over gas.  I did figure out that it has a very similar engine to a 1988 mazda b2200 2.2L FE (still haven't found the engine tag).  Also put a little time into seeing how a propane system works, and it is pretty much the same as gas.  A little conversion kit is all it took, and it burns the gas like any other fuel.  Boom! and the crank goes round.  Pretty basic, but I wanted to make sure before I tore into it.  I'll get some pics of the gasket and head damage after I do that propane damage research.  

Total hours must be around: 18

Sunday, November 25, 2012

Disassembly is the easy part

I checked and adjusted the Cummins ISX valves in the dyno room, including engine brake exhaust valve and the injector.  Injector only requires a torque value, while the valves all required setting to clearance and then torquing.  The engine brake took some figuring out.  I know now howto set the rail for the neutral detent position, as well as setting the set screw for 7mm movement.  I had to use a magnetic base dial indicator since I did not have a 7mm feeler gauge.  After set, I scanned the ECM for codes.


By far the most important thing that I've learned over this engine section of the quarter is how important cleanliness is while working.  Worked on the 16 cylinder cat engine set up at school.  Got the head off, piston pulled, and liner removed and spent a good deal of time cleaning.


I hooked up the Modis to my pickup because it was idling high, and then when the engine speed dropped the engine felt like it was misfiring quite a bit.  Also have quite a high pitched noise that goes away, or at least diminishes significantly, with throttle applied.  KOER tests showed misfire counts progressively going up at around 2 per second.  The long term fuel trim (LTFT) reading on bank 2 was reading a value of 10 during low idle, and would drop to around 3 with throttle.  short term fuel trim (STFT) readings were good for both banks, at close to 1.  The values for bank 1 LTFT were also close to 1 consistently.


"LTFT Adaptation Valve Positive (+) LTFT>1:  A) Lack of fuel or too much air, ECU is attempting to increase the amount of fuel by increasing the injector open time and/or B) could be caused by unmetered air leaking past the EVAP, EGR, or into the air intake system after the Air Mass Meter (MAF) or a fuel pump delivery problem or clogged or damaged fuel injector."

Set up a compression test for cyliners 1-6 respectively (psi): 183, 171, 171, 175, 180, 177.  I seem to remember that alldata has information stating that I should really be concerned if I have a low range of around 125 if my highest reading is 175.  Spark plug gaps should be 0.042-0.044 in, ended up being: 0.054, 0.056, 0.054, 0.050, 0.075, 0.054.  Plugs on cylinders 2,3, and 5 had heavy amounts of wet oil and cylinder 5 had a large amount of caked on... gunk (?).  Picked up another gasket set and head bolts and set about doing the job right.
 I scrubbed away at the vibration damper to find the ever elusive timing marks.  From there, I took a page from something Raul told me about and I measured around the circumference (18 in), then divided by 3 to get marks every 120*.  Knowing the firing order, I know which piston is at TDC for each mark.  I spent an easy 12 hours cleaning and chasing threads over the weekend, as well as found that at least 2 of my valve stem seals were torn or the compression spring had failed.  Both rubber gaskets between the lower intake manifold and block were shredded as well as both gaskets between lower intake manifold and cylinder head were torn.  I attribute those rapid failures to my lack of preparation and cleanliness of mating surfaces.  I am also hoping that the valve train noise under load, as mentioned in previous posts, will be resolved.  I figure that because I did not chase the rocker arm fulcrum bolt holes my torque values are not even close to accurate, which could, from what I'm thinking, cause the rockers to be looser than tolerance.  I'm hoping.


Hours for last 2 weeks: 56
Total Hours: 315