

 Steering axle/foundation brake inspection


 Drive axle/foundation brake inspection
Removed the drive axle, foundation brakes, and adjuster arm for inspection. If I could have, I would have made sure the circuit had 90 psi in the system before checking adjustment with the parking brakes released. I would then use a brake tool to pry the pushrod making sure that it is within 3/4 to 1 1/2" of my 2 1/2" spec for type-30 can. After installing the S-cams I checked vertical play and end-play to verify that the bushings were not worn or I didn't need spacers on the s-cam itself. Both were at ~.03" of play.
I then replaced the wheel seal and after washing both bearings in the parts washer I inspected them under a light for cracks/breaks, nicks in the rollers, etc. I tightened the inner nut to 200 ft/lbs --> backed off 1 full turn --> torqued to 50 ft/lbs --> backed off 1/4 turn. From there installed the lock washers and guide, then torqued the outer nut to around 475 ft/lbs. All the while rotating the wheel as I torqued them down. After failing a couple times, I ended up having my wheel end adjustment as close to .001" as I could.
From there it was a fairly simple task of cleaning the spider assy, as well as the drum itself. Putting it all back together went smoothly. For these particular brakes it was easier to put the rollers in the shoes before putting then on the spider. From the pics I've posted, I kept all my parts and tools in a clean and organized manner so as not to get more confused than normal.
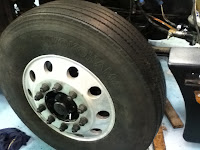
Put the tires back on with little to no effort using a tire bar and torqued them down to spec (I believe they were called out at 450-500 ft/lbs).
This is a video of the planetary gear set in the ZF Loader and Gary, Jeremy, and I tore apart and put back together.